Yosemite is more beautiful in the snow. OK, that’s an opinion, but come and check it out for yourself, and we bet you’ll agree. Snowy conditions can be a little more challenging, but if you’re up for some adventure, and keep these important tips in mind, there is nothing quite like exploring Yosemite when it’s blanketed in white.
It may be hard to imagine encountering many feet of snow in the Yosemite high country after driving through the heat of the California Central Valley. However, due to the big elevation differences within Yosemite National Park, some hikers and backpackers get caught unprepared for snow that can last until late summer in a big snow year.
As you plan your backpacking or hiking trip at higher elevations during winter, spring or sometimes long into the summer months, keep these important safety tips in mind.
Tip #1: Keep Your Decision-Making Skills Sharp
Making good decisions is the grand-daddy of all tips related to safety in the outdoors. It’s the most important tool in your toolbox, especially when it comes to snow-travel. And making good decisions starts with your choice of a route or destination, figuring out when and where you might encounter snow in the first place and whether those conditions are reasonable for you or not.
Try to find recent trail conditions online. If you can’t find information on the exact route you’re interested in, then sometimes other hikes at the same elevation can give you clues about what to expect.
Winter and spring snow conditions change rapidly, often evolving substantially over the course of a single day. For example, in high water the bridge at the base of Wapama Fall in Hetch Hetchy can go from a refreshing shower to a dangerous torrent from one day to the next depending on temperature and time of day. Just because someone crossed the bridge earlier doesn’t necessarily mean that this is a good decision for you. Fit, strong, experienced hikers have died crossing this bridge on a day when others have crossed without incident.
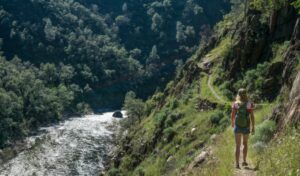
Fortunately, because Yosemite National Park’s elevation ranges from a mere 2,127 feet (648 m) up to 13,114 feet (3,997 m) you can often find the hike with the right amount of snow (and water) for you. Hikes along Hwy 140 and closer to Mariposa tend to be snow-free most of the year, even while resort ski conditions at higher elevations are at their peak.
Above all, don’t be afraid to turn around and save your planned hike for another day if the conditions just don’t feel right for you.
Tip # 2: Carry Appropriate Gear for Extended Snow Travel

If your proposed route is going to have a lot of steep snow travel, consider bringing additional equipment with you.
Cooler temperatures at night can cause the snow to freeze, making it impossible to kick steps into the snow. If the trail is at all steep, this can lead to slippery conditions and a long fall if you lose your footing. While sliding down a short snow slope with a clear runout might be no more dangerous than a kids sledding hill, sliding down a long slope with rocks or trees to hit at the bottom can result in serious injury or worse.
For icy conditions, an ice axe and crampons, and the knowledge of how to use them, add a margin of safety. Light-weight crampons or microspikes can give you extra traction and help prevent slips. The ice axe is the best safety tool for steep snow. By plunging the shaft of the axe into the snow, you can also create a stable anchor with each step. Plus, ice axes are useful for arresting your fall if you do slip.
On the other extreme, by mid-afternoon the snow can soften until you’re sinking in to your ankles, or punching through a crust into softer snow below (post-holing). Sometimes as the snow conditions change, you may be able to take a few steps on the top of the snow, and then suddenly plunge through up to your knees or beyond.
Mostly this is just more tiring, but if you could end up spending a lot of time on this kind of snow, a pair of lightweight snowshoes or skis could be a welcome option. Plus, skis make for fast and fun descents!
With the right gear and the knowledge to use it, snow becomes a bonus to a backcountry outing.
Tip #3: Have Navigation Systems Dialed
Easy-to-follow trails can turn into a navigation challenge when snow covers long sections of the trail. It’s all too easy to take a wrong turn or get disoriented in those conditions.
Of course you may be able to follow pre-existing tracks. Just keep in mind the people you are following might not know where they were going either.
In snowy conditions it’s more important than ever to have and know how to use a solid navigation system. A good GPS app with downloadable maps that work even without a cell connection can be invaluable. Just remember to also carry a map and compass and know how to use them to navigate, because they never run out of batteries.
On the plus side, from a Leave No Trace perspective, snow protects the underlying ground from damage. It acts as a ‘durable surface’ that you can camp and travel on, and when deep enough covers troublesome manzanita bushes that can make travel difficult, giving you even more freedom to explore.
Tip # 4: Watch for Snow Bridges and Sun Cups

Snow doesn’t melt evenly from the top down, and as the sun hits high elevation snow these strange features can create difficult walking conditions.
Snow that is exposed to the sun can forms wells and troughs called sun cups typically seen in the spring and summer months. Sun cups can be relatively shallow and easy to navigate, or they can be more than a foot deep, creating tightly spaced slippery hurdles along your route. The steep slippery ridges between deep sun cups can throw you off balance, slow you down and tire you out more than walking along a well-maintained trail. When snow remains at the high elevations, it is essential to plan extra time for slower travel.
Snow can also melt from below especially when there is moving water under the snow. This can leave thin snow bridges that may look like the surrounding snow on the surface, but are actually only a few inches thick. Thin snow bridges can be too weak to bear the weight of a hiker. While suncups are mostly an inconvenience, punching through a snow bridge, especially one that spans fast-moving melt water, can be a real danger. Be especially on the lookout for snow bridges if you can hear running water, or see places where open water runs under the snow.
In both cases, hiking poles can be helpful. Hiking poles can help you keep your balance on the uneven terrain caused by suncups and can double as a probe to test the solidity of the snow in front of you if you can hear running water and are unsure how stable the snowbridge is. (To use it as a probe, you need to invert it so that it doesn’t get hung up on the pole baskets).
Tip #5: Be Prepared for Big Water
With a large snowpack, comes high water with swift icy currents. Logs and stepping stones that might have allowed you to cross the stream without getting your feet wet may be underwater.
When crossing creeks in high water conditions chose your crossing point carefully. Sometimes the best crossing is up or downstream from the normal trail crossing. Look for downstream hazards like waterfalls, boulders, strainers or places where the banks are so steep you won’t be able to climb out again. Unfasten the waist belt and sternum strap on your pack so that if you do lose your balance and fall in your pack doesn’t become an anchor. If you’re using hiking poles, slip the straps off for the same reason. Facing upstream into the current tends to be more stable. Bring extra shoes or other foot protection to cross rocky streams to avoid injuring your feet, while keeping your hiking shoes dry. Alternatively, plan to hike with wet feet. Extra dry socks can be a lightweight insurance policy.
Keep in mind that swift water is extremely dangerous. The cold can incapacitate you in seconds, the hydraulics can pull you under, the swift current can carry you into rocks and over waterfalls. Be prepared to turn around if a crossing is too dangerous.
Bonus Tip: Wear Extra Sun Protection!
Even experienced hikers and backpackers get surprised by the intensity of the sun on a high-elevation Sierra outing. UV exposure at altitude is significantly higher than at sea level, and although it’s less of an immediate safety concern, your skin will thank you in the long run.
When there is snow on the ground, the white surface also reflects the sun’s rays, making it easy to burn in unexpected places like the underside of your nose or beneath your ears.
Wear a broad-spectrum high SPF sunscreen and remember to reapply regularly. Lightweight long-sleeved nylon hiking shirts, long pants and a wide-brimmed hat are also strongly recommended ““ and can double as mosquito defense as well.
Want more info on planning a winter trip?
If all this talk of snow travel makes you excited to plan a winter trip, check out our list of top Yosemite winter hikes, and other winter activities. And don’t forget to create magical memories of your snowy trip with these winter Yosemite photo tips.
- July 16, 2026Tips to A Great Yosemite Summer VisitPlan your Yosemite summer getaway with tips on exploring Hetch Hetchy, Yosemite Valley, Tioga Road, and relaxing by the Merced River.Catch these must-know tips to make the most of your time in Yosemite.Read More

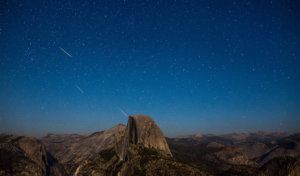
- July 14, 2026How to Watch the Perseid Meteor Shower in Yosemite Mariposa CountyWish upon a shooting star during the Perseid Meteor Shower in Yosemite Mariposa County. The dark night skies in this area create exceptional night-sky viewing. So, read up for more information on where to go and what to bring with you this year.Read More
- May 14, 2026100 Things To Do In Mariposa County | Outside YosemiteDiscover 100 things to do in Mariposa County beyond Yosemite National Park, from outdoor adventures and historic Gold Rush towns to local food, lakes, art, and hidden gems throughout the Sierra foothills.Read More